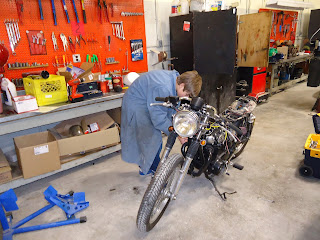
With a completion date of March starting to loom in the not-so-distant future, and with kids busy with hockey and other activities, Mr. S has come in solo to complete the rest of the wiring. A tedious job, but thanks to Mr. Gugin and some of his testing equipment, some stubborn questions have been answered, and the bike is now wired. Working on 2 or more wiring diagrams was bound to be difficult, but Mr. G's experience sure helped out.
We were also able to benefit from a really cool hydraulic pipe expander that Minnedosa Collegiate has in their shop. The Dime City Cycles muffler fit too snugly with the MAC headers. A wee tweak with the pipe expander, and things now slide on and off with a near-perfect slip fit. A clamp is next, and the final step will be to weld a muffler mount to the frame.
After that it will be a mad rush to tear the bike down for powdercoating, paint, and final assembly. More pics to follow after the Christmas break. Stay tuned!
Thursday, December 19, 2013
Wednesday, December 11, 2013
Christmas homework
As promised, here is a pic of the beautiful welding done by our supporters, Cycleboyz in Brandon.
 This is a stainless steel muffler mount, fabricated and welded onto our muffler donated by Dime City Choppers. As you can see, the welding quality and general workmanship is superb. Thanks Cycleboyz! Check out their shop and some of their projects via the link on the right.
 Just in time for Christmas, now that the mechanical and electrical work is being completed, we need to starting thinking about the aesthetics of the machine... the color combinations, including the frame, swingarm, tank, and tail section. Based on suggestions that come forward, we might vote, we may draw out of a hat... who knows? Mr. Sheppard spent lunch hour sketching/tracing the side profile you see to the left; some work with some pencil crayons and/or markers and we should have some good ideas!


Monday, December 9, 2013
A bit of "dirty work"
The new Dime City Cycles muffler fit quite snugly onto the MAC header... to snugly, in fact. One of the necessary jobs was to remove the surface coating from the header (some sort of black, super-hard paint) to see if this would be enough to allow the muffler to slide one. First step is to remove the headers...
 Like a lot of these rebuild/restore projects, parts need to be installed and removed several times during the build. I've lost count regarding the exhaust system!
 We borrowed an angle grinder with an abrasive wire wheel to remove the header coating. Even with this tool, it took quite some time to get paint off. We will need to wait to see if this is sufficient to install the muffler... while this was going on, Cycleboyz were doing their usual tig-welding magic on the muffler. Being built in stainless, a muffler mount needed to be welded to the body of the muffler for us to fabricate a mount. As usual, their workmanship was stellar and they didn't charge us anything. Thanks yet again, guys!
There is still some work to do regarding the wiring system. Now that all the indicators work, headlight, tail light, etc.... we are getting some sort of short somewhere that is blowing fuses! Looks like we need to tear into the wiring harness to find the culprit. It will give us a chance to review the original schematic to search for faults.


There is still some work to do regarding the wiring system. Now that all the indicators work, headlight, tail light, etc.... we are getting some sort of short somewhere that is blowing fuses! Looks like we need to tear into the wiring harness to find the culprit. It will give us a chance to review the original schematic to search for faults.
Subscribe to:
Posts (Atom)