Thursday, November 29, 2012

Celtic Power!

Celtic Power and Machining did some work for us on our stock front brake rotor.  We've decided to stick with the stock rotor, but hopefully upgrade to a stronger/more modern caliper.  The stock rotor was solid, and incredibly heavy at over 7mm thick... modern rotors are around 5mm!  Hopefully we've taken a bit of weight off of the assembly by getting Celtic to drill these holes... and it should help with heat dissapation as well.  The kids decided the "direction" of the rotor "swirls" -- they wanted the angle to point "forward" to make it look more aggressive.  You'll see what we mean when it is mounted on the bike.  A big thanks to Gavin and Brian for helping us out with this project... I suspect we will be making more visits to their shop.  You can check out the diverse services they offer by checking out the link to the right.

Wednesday, November 28, 2012

Visible Progress

For the last month or so, it has been an exercize in patience for the students (and myself).  The needed work was getting done, but the forkless front end had the remainder of the bike sitting forlornly on the floor of the shop.  With the help of Hugh's Handbuilt and his step-by-step instructions, we were able to rebuild the front forks.  The final step in the process is adding the requisite fork oil...

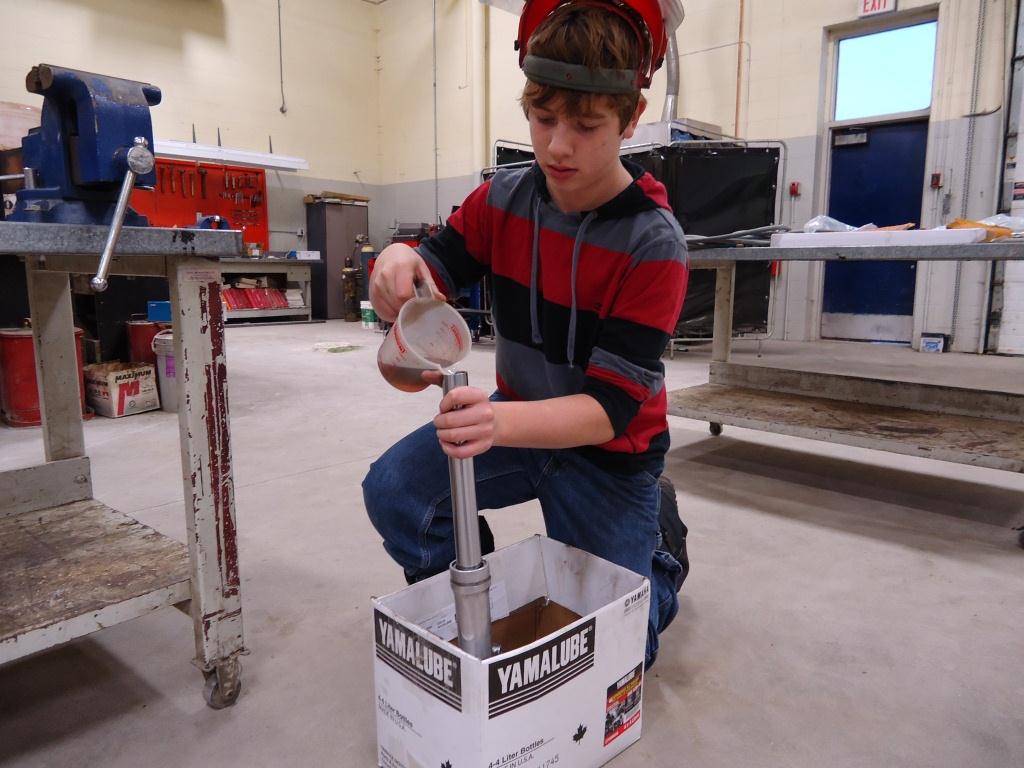
The end result is a pretty trick front end to the bike:  lowered 2" for a proper cafe stance, polished and shaved lower sliders, new bushings, new upper tubes, and retro fork boots.  Basically, a brand new front end!
With a bit of gruntwork, the forks were reinstalled, and the seat and tank test-fitted.  It actually resembles a motorcycle!

A phrase I always remembered from reading my Dad's airplane magazines, was when other flyers were building a homebuilt airplane, they commonly said, "50% done, 90% left to go."  The devil is in the details, and the details is what is left.  A real quandry is coming up with a DOT approved rear tailight that doesn't mess up the lines of the rear seat...

Wednesday, November 21, 2012

Sparks!

The last session saw the students do some constructive and destructive things.  First, the carburetor and adapter were test-fitted to the intake manifold.  Everything lined up as it should.  However the custom throttle cable that needs to be made is a bit longer than expected, so Mr. Sheppard is out of a length of inner wire.  Some more will need to be ordered.

It took a bit of fiddling, but the students did get it mounted.

We then test-fitted the fuel tank and seat.  Once everthing appeared to be lined up, we realized the rear seat rail/loop had to be removed.  This is common for cafe bikes, which were originally designed to fit two passengers.  The students steadied the bike while Mr. Sheppard cut off the rail. 

Next, both kids took a stab at grinding down the remains of the seat hinges.

Two down, two to go...

It now appears that we will likely need to repaint/refinish the frame.  New seat mounts will need to be welded on to accomodate the seat.  Regardless, the end result should be pretty cool!

Minnedosa and District Foundation

We recently attended a grants luncheon put on by the Minnedosa and District Foundation.  After a delicious lunch, we were presented with a $2000.00 donation to the Kids' Cafe project.  Here, Barney Walterson presents the cheque to Mr. Sheppard and a Cafe club member. 

Monday, November 19, 2012

Hugh Does it Again

Got this email from Hugh at Hugh's Handbuilt... I had followed up after sending our fork lowers down to him to get shaved and polished.  Just to give him the heads up about the shipping address, and how I would pay for the work he did...

Here is his email:

James,

They are packaged up and ready to ship back to you.  I don't want to see you folks have any financial hardships with the project, so no charge - just let those young folks have fun and learn to wrench a bit more :)

From someone who always wanted to be a teacher - it is my pleasure to help.  Thanks again


Hugh

Wow -- more free stuff from Hugh.  He's the man!  As always, check out his site to the right.  He deserves your business!

Wednesday, November 14, 2012

Makin' Gaskets

A weak Saturday Nite Live reference there... anyway, the last session saw us fabricate some new gaskets for the sidecovers.  We removed them to get them refinished (Mr. S ended up polishing them with some equipment at home), and in the process tore some of the stock gaskets.  Rather than order/buy new ones, we decided to make our own, using some gasket paper Mr. Sheppard dug up at home.  An exacto knife, some scissors, and a hole punch had us make some replacements.
A steady hand an some patience, using a stock gasket as a template, got us what we needed.  We did end up tearing one gasket.  I think a sharper/newer blade would have made things easier... a famous saying is, "there is nothing more dangerous than a dull knife!"

While gaskets were being created, the trusty dremel tool made an appearance.  A number of tabs needed to be removed in order to fit the manx seat.  We borrowed the face/eye protection from the MCI shops.

A slow process, but it needs to be done.

Finally, the Ultrasonic Cleaner Mr. Sheppard ordered showed up.  Kinda looks like a mini deep fryer.

The fuel petcock parts were pretty gummed up -- the fuel had begun to "varnish" over the 35-odd years it had been used.  However, after a few cleaning cycles, the difference is visible.  I think a more roboust machine would do it in one cleaning cycle, but those were far more expensive.  The best part is it uses plain water, so no messing with gasoline, varsol, or worse yet, acetone.  The students may do a science project for their academic class on how exactly ultrasonic machines work ('cause Mr. Sheppard has no clue!)

Saturday, November 10, 2012

Cycleboyz Steps in Again!

Awhile back I dropped the fuel tank off at Cycleboyz to get some work done on the fuel cap.  As usual, they have exceeded expectations.  A new, low-profile cap was installed in place of the old clunky stock item -- the one in which the cap didn't work and the key was missing.  The end result shows the quality of their workmanship...


While there still is some bodywork needed to clean the area up, you get a sense of how nice an expert with a tig torch can fabricate things with.

To open the cap, you press down slightly, and then give it a quarter turn to the left.  The top pops up, and you can then remove the cap!  The best news is that the cap, and the considerable work to fit it, was donated by the gang at the shop.  That is an amazing show of generosity, and much appreciated!!!  Be sure to check out their website to the right, or better yet, stop on by the shop; an awesome bunch of people to work with!

Next step is to clean out the inside of the tank.  We plan to use the "kreem" product, a 3-step process that if done correctly, seals the tank up quite well.  I need to head to Transcanada and order the kit.  First I took some time at home on the weekend to fabricate some block-off plates that are needed to cover the ports for the petcocks.  One of the students made a template a few weeks ago that I used, along with some scrap aluminum I had lying around.  There is also some "Yamabond"-type gasket sealer to prevent the chemicals from leaking out.


Wednesday, November 7, 2012

Shocking Developments!


Sorry for the pun... I used to be an English teacher, ya know.  Anyway, yesterday saw the Kids Cafe begin to put some of the new parts on the bike.  First, a "proper" set of performance rear shocks went on.  The ones we had were likely fine (they looked new), but these items, in the Monza style, have a remote resevior and will likely help the bike handle twisty roads.  They look pretty cool on the bike!


Hugh's Handbuilt sent us some of his solid mount risers, as well as a fork lowering kit.  These are the risers being installed.  Very impressive quality!  The busings are solid aluminum, with a neat o-ring to keep them in place.  Here the students are installing the clubman cafe bars into the riser mounts.  Hugh machined the bore to exact specifications as well...


So exact, in fact, that we needed to sand off the powdercoating on the riser shaft to get the risers to go into the bore.  Powder coating can be thick, but it speaks to the precision of Hugh's stuff that we needed to remove a bit of paint.  While two students sand, the third disassembles the Mikuni carb to get the correct jets installed (to be purchased at a later date).


One of the last things we did was test-fit the enforcer intake.  This, as well as the Mikuni carb, will really set our bike apart from the rest.  We also have the correct jet information (or at least a starting point) to work with this unique intake setup.


Finally we installed the instrument bracket donated by n-r performance.  A lovely bit of machined aluminum, the included spacers and bushings really cleaned up the looks of the top triple clamps.  These are originally meant for SR400s and SR500s, but would also work with xs650s.  The supplied allen bolts were a tad long for our application, so we used some temporary hardware and will get the proper length bolts eventually.  It's these details which really clean up a machine!

You'll notice the too-long clutch cable as well.  xs650s are notorious for a heavy clutch pull -- Mr. Sheppard is scheming to come up with a hydraulic version which might work much better.  As usual, stay tuned...

Monday, November 5, 2012

Parts Run

Hopefully our last major bulk purchase of items have arrived.  Mr. Sheppard made another run to the border to pick up a pile of things, both free and purchased.  You can see in earlier posts where companies have donated parts to our project.  Shortly you will see these being installed on the bike as it continues to come together.  Should be an exciting time!


A local gentleman by the name of Dave McFarlane dropped off some parts for our project as well.  Dave has built an XS650 in the style of a "bobber", and so had some leftover parts for us to use.  Quite a bit of electrical parts, a wiring harness, mirrors, and a few master cylinders for the front brake came in the box he left.  Dave even agreed to donate the parts for free!


Included in the box of new stuff are fork tubes, rear shocks, a speedo cable, as well as this intake system.  This will definately make our bike stand out!!!