Friday, December 14, 2012

"Invisible" Brackets and Nasty Chemicals

Mr. Sheppard got nailed with the flu on Dec. 4, so we missed a Cafe session that day.  On the 11th, Mr. S forgot to charge the batteries in the camera, so this post is a little delayed.  It will also be the last post before Christmas break as some other school activities next week will get in the way of our scheduled time.
It took some time, but we have finally mounted the hi-power ignition coil.  It was an interesting process and discussion with the students... a lot of time and effort was put into a bracket that no one would ever see (unless you removed the tank).  We talked a bit about the importance of having high standards... "good enough" sometimes isn't, when you are putting your name or your reputation on something.  The bracket isn't fine art, but the holes are centered, they are equally spaced, we used matching bolts that are the correct size, washers, and locknuts.  Again, a lot of effort, but WE know it was properly engineered.  Even making the spacers from some surplus stock sourced from Mr. Sheppard's garage had to be measured, cut, filed, measured again, until they were identical.  You can see one of the spark plug leads is installed as well.

Speaking of spark plugs and coils, the process of figuring out a 40 year-old wiring harness is underway.  A bit monotonus, but its better to label wires now, rather than just start sticking leads together!

Finally, the tank is at a point where it can be prepped for paint.  Part of that is to remove the rust from the inside of the tank, and then coat it.  The quote to get it done professionally in Brandon was far too much, even with a discount.  We decided to use Kreem tank liner.  A 3-step process: the rust is removed, the tank flushed with water, then acetone added to get rid of the water, and finally the tank liner is applied.  A drawn-out job, but it has to be done exactly as described in the directions.  The students helped get the caustic chemical into the tank to get at the rust and etch the metal.  Mr. Sheppard used his failing artistic ability to warn off any High School shops students from poking noses or fingers into the tank while it "cooked".  It was pretty rusty, so we let it sit for a few days.

Thursday, November 29, 2012

Celtic Power!

Celtic Power and Machining did some work for us on our stock front brake rotor.  We've decided to stick with the stock rotor, but hopefully upgrade to a stronger/more modern caliper.  The stock rotor was solid, and incredibly heavy at over 7mm thick... modern rotors are around 5mm!  Hopefully we've taken a bit of weight off of the assembly by getting Celtic to drill these holes... and it should help with heat dissapation as well.  The kids decided the "direction" of the rotor "swirls" -- they wanted the angle to point "forward" to make it look more aggressive.  You'll see what we mean when it is mounted on the bike.  A big thanks to Gavin and Brian for helping us out with this project... I suspect we will be making more visits to their shop.  You can check out the diverse services they offer by checking out the link to the right.

Wednesday, November 28, 2012

Visible Progress

For the last month or so, it has been an exercize in patience for the students (and myself).  The needed work was getting done, but the forkless front end had the remainder of the bike sitting forlornly on the floor of the shop.  With the help of Hugh's Handbuilt and his step-by-step instructions, we were able to rebuild the front forks.  The final step in the process is adding the requisite fork oil...

The end result is a pretty trick front end to the bike:  lowered 2" for a proper cafe stance, polished and shaved lower sliders, new bushings, new upper tubes, and retro fork boots.  Basically, a brand new front end!
With a bit of gruntwork, the forks were reinstalled, and the seat and tank test-fitted.  It actually resembles a motorcycle!

A phrase I always remembered from reading my Dad's airplane magazines, was when other flyers were building a homebuilt airplane, they commonly said, "50% done, 90% left to go."  The devil is in the details, and the details is what is left.  A real quandry is coming up with a DOT approved rear tailight that doesn't mess up the lines of the rear seat...

Wednesday, November 21, 2012

Sparks!

The last session saw the students do some constructive and destructive things.  First, the carburetor and adapter were test-fitted to the intake manifold.  Everything lined up as it should.  However the custom throttle cable that needs to be made is a bit longer than expected, so Mr. Sheppard is out of a length of inner wire.  Some more will need to be ordered.

It took a bit of fiddling, but the students did get it mounted.

We then test-fitted the fuel tank and seat.  Once everthing appeared to be lined up, we realized the rear seat rail/loop had to be removed.  This is common for cafe bikes, which were originally designed to fit two passengers.  The students steadied the bike while Mr. Sheppard cut off the rail. 

Next, both kids took a stab at grinding down the remains of the seat hinges.

Two down, two to go...

It now appears that we will likely need to repaint/refinish the frame.  New seat mounts will need to be welded on to accomodate the seat.  Regardless, the end result should be pretty cool!

Minnedosa and District Foundation

We recently attended a grants luncheon put on by the Minnedosa and District Foundation.  After a delicious lunch, we were presented with a $2000.00 donation to the Kids' Cafe project.  Here, Barney Walterson presents the cheque to Mr. Sheppard and a Cafe club member. 

Monday, November 19, 2012

Hugh Does it Again

Got this email from Hugh at Hugh's Handbuilt... I had followed up after sending our fork lowers down to him to get shaved and polished.  Just to give him the heads up about the shipping address, and how I would pay for the work he did...

Here is his email:

James,

They are packaged up and ready to ship back to you.  I don't want to see you folks have any financial hardships with the project, so no charge - just let those young folks have fun and learn to wrench a bit more :)

From someone who always wanted to be a teacher - it is my pleasure to help.  Thanks again


Hugh

Wow -- more free stuff from Hugh.  He's the man!  As always, check out his site to the right.  He deserves your business!

Wednesday, November 14, 2012

Makin' Gaskets

A weak Saturday Nite Live reference there... anyway, the last session saw us fabricate some new gaskets for the sidecovers.  We removed them to get them refinished (Mr. S ended up polishing them with some equipment at home), and in the process tore some of the stock gaskets.  Rather than order/buy new ones, we decided to make our own, using some gasket paper Mr. Sheppard dug up at home.  An exacto knife, some scissors, and a hole punch had us make some replacements.
A steady hand an some patience, using a stock gasket as a template, got us what we needed.  We did end up tearing one gasket.  I think a sharper/newer blade would have made things easier... a famous saying is, "there is nothing more dangerous than a dull knife!"

While gaskets were being created, the trusty dremel tool made an appearance.  A number of tabs needed to be removed in order to fit the manx seat.  We borrowed the face/eye protection from the MCI shops.

A slow process, but it needs to be done.

Finally, the Ultrasonic Cleaner Mr. Sheppard ordered showed up.  Kinda looks like a mini deep fryer.

The fuel petcock parts were pretty gummed up -- the fuel had begun to "varnish" over the 35-odd years it had been used.  However, after a few cleaning cycles, the difference is visible.  I think a more roboust machine would do it in one cleaning cycle, but those were far more expensive.  The best part is it uses plain water, so no messing with gasoline, varsol, or worse yet, acetone.  The students may do a science project for their academic class on how exactly ultrasonic machines work ('cause Mr. Sheppard has no clue!)

Saturday, November 10, 2012

Cycleboyz Steps in Again!

Awhile back I dropped the fuel tank off at Cycleboyz to get some work done on the fuel cap.  As usual, they have exceeded expectations.  A new, low-profile cap was installed in place of the old clunky stock item -- the one in which the cap didn't work and the key was missing.  The end result shows the quality of their workmanship...


While there still is some bodywork needed to clean the area up, you get a sense of how nice an expert with a tig torch can fabricate things with.

To open the cap, you press down slightly, and then give it a quarter turn to the left.  The top pops up, and you can then remove the cap!  The best news is that the cap, and the considerable work to fit it, was donated by the gang at the shop.  That is an amazing show of generosity, and much appreciated!!!  Be sure to check out their website to the right, or better yet, stop on by the shop; an awesome bunch of people to work with!

Next step is to clean out the inside of the tank.  We plan to use the "kreem" product, a 3-step process that if done correctly, seals the tank up quite well.  I need to head to Transcanada and order the kit.  First I took some time at home on the weekend to fabricate some block-off plates that are needed to cover the ports for the petcocks.  One of the students made a template a few weeks ago that I used, along with some scrap aluminum I had lying around.  There is also some "Yamabond"-type gasket sealer to prevent the chemicals from leaking out.


Wednesday, November 7, 2012

Shocking Developments!


Sorry for the pun... I used to be an English teacher, ya know.  Anyway, yesterday saw the Kids Cafe begin to put some of the new parts on the bike.  First, a "proper" set of performance rear shocks went on.  The ones we had were likely fine (they looked new), but these items, in the Monza style, have a remote resevior and will likely help the bike handle twisty roads.  They look pretty cool on the bike!


Hugh's Handbuilt sent us some of his solid mount risers, as well as a fork lowering kit.  These are the risers being installed.  Very impressive quality!  The busings are solid aluminum, with a neat o-ring to keep them in place.  Here the students are installing the clubman cafe bars into the riser mounts.  Hugh machined the bore to exact specifications as well...


So exact, in fact, that we needed to sand off the powdercoating on the riser shaft to get the risers to go into the bore.  Powder coating can be thick, but it speaks to the precision of Hugh's stuff that we needed to remove a bit of paint.  While two students sand, the third disassembles the Mikuni carb to get the correct jets installed (to be purchased at a later date).


One of the last things we did was test-fit the enforcer intake.  This, as well as the Mikuni carb, will really set our bike apart from the rest.  We also have the correct jet information (or at least a starting point) to work with this unique intake setup.


Finally we installed the instrument bracket donated by n-r performance.  A lovely bit of machined aluminum, the included spacers and bushings really cleaned up the looks of the top triple clamps.  These are originally meant for SR400s and SR500s, but would also work with xs650s.  The supplied allen bolts were a tad long for our application, so we used some temporary hardware and will get the proper length bolts eventually.  It's these details which really clean up a machine!

You'll notice the too-long clutch cable as well.  xs650s are notorious for a heavy clutch pull -- Mr. Sheppard is scheming to come up with a hydraulic version which might work much better.  As usual, stay tuned...

Monday, November 5, 2012

Parts Run

Hopefully our last major bulk purchase of items have arrived.  Mr. Sheppard made another run to the border to pick up a pile of things, both free and purchased.  You can see in earlier posts where companies have donated parts to our project.  Shortly you will see these being installed on the bike as it continues to come together.  Should be an exciting time!


A local gentleman by the name of Dave McFarlane dropped off some parts for our project as well.  Dave has built an XS650 in the style of a "bobber", and so had some leftover parts for us to use.  Quite a bit of electrical parts, a wiring harness, mirrors, and a few master cylinders for the front brake came in the box he left.  Dave even agreed to donate the parts for free!


Included in the box of new stuff are fork tubes, rear shocks, a speedo cable, as well as this intake system.  This will definately make our bike stand out!!!

Wednesday, October 31, 2012

4 Figures!

According to our hit counter at the bottom of the page, there has been 1000 unique page views to our blog site.  Perhaps the article in the local newspaper helped as well -- a reporter from the Minnedosa Tribune stopped by to do an interview and take some pictures of the students at work.  The coverage was helpful, I was also able to "plug" the sponsors of our project.  The least we can do to acknowledge their support!
Yesterday was another Cafe meeting, and the three students set about working on the fork internals, the rearsets, and rear fender.

Unfortunately we were lacking the correct drill bit size to do the "Minton Modification" to the damper rod assembly.  We did notice, however, that it appears Yamaha did upgrade the forks from 1976 to 1981 -- our later model forks already had some additional damping orifices added.  We still need to drill 2 holes in each rod -- Mr. Sheppard will bring one of his 1/16 drill bits from home.

The rearsets (footpegs) seem to be good quality and fairly sturdy.  However they came with no installation instructions, so I left it to the students to figure it out on their own.


In the end, the kids got them fitted, and while the final adjustments are still to come, the transmission works (we rotated the countershaft sprocket by hand while going up and down through the gears), and the rear drum brake operates properly.

Left hand side (shifter side) installed.

Mr. Sheppard plans to make another trip to Rolla, ND, to pick up some more parts for the project, as well as an ultrasonic cleaner to finish off the fuel petcock rebuild.

Friday, October 26, 2012

Shipping the Forks

We've decided to get the fork lowers on the 1981 forks refreshed.  We are going to ship them off to Hugh of Hugh's Handbuilt to get them shaved and polished.  The brake caliper lugs on the LHS fork lower will be removed, as we are only going to run the single caliper on the RHS.
Today we boxed up the lowers and got them ready to ship.  Please note my impeccably clean office... :(


On yet another positive note, Ken atNR Performance has agreed to donate one of his guauge brackets to our project.  We are going to go with just the speedo, as the tachometer drive has been deleted, which we will block that off at the crankcase.  A student and I headed over to the High School to take some measurements to confirm fitment.  Things should line up quite nicely!  Please check out Ken's site to the right on our list of supporters. 

Tuesday, October 23, 2012

Day 4

We had the new front forks and triple clamps to test-fit today.  We also double-checked the clutch operation with the new parts from Transcanada.  We didn't take any pics today, as Heidi came by from the Minnedosa Tribune to do a story on the bike project.
We put the front end on and things mocked up properly.  We then removed the fork tubes in order to rebuild those.  It is obvious we need to do something with the fork lowers, but at least the upper tubes, the sliders, were in good shape.  After some discussion, I think we will either polish the lowers or get them powder-coated.  We might need to do a vote or something!
One fork came apart pretty easily, but the other tube was far more stubborn.  We ended up calling it a day (at our usual stop time) with one fork disassembled, and the other still stubbornly in one piece.  What we realized is we needed a 17mm Allen wrench -- we actually did have one -- but one that was about 2 feet in length.  Mr. Sheppard took the fork home to see if he could come up with something.
Rooting around in a scrap bin, a 17mm domed nut and a length of threaded rod (wrong thread size, however) were dug up.  A wee bit of welding with the oxy-acetylene kit, and a new tool is born.
A good lesson.  Sometimes, you just have to stop and think about things if you are getting nowhere.    It is too bad the two students weren't around when the tool was made, or used successfully to finish the disassembly.  We'll be sure to look it over tomorrow or at the next session to see how with some ingenuity, we can solve a problem.  Certainly nothing like what you would see on American Choppers, but it worked a treat!

Pandemonium Choppers Steps Up

Pandemonium Choppers has agreed to donate one of their brake kits to our cause.  This will allow us to use a more modern brake caliper to improve the braking (and therefore the safety) of our machine.  It utilizes a rotor spacer, a caliper braket, and they have also agreed to include a brembo caliper as well!!!

Donation News!!!

I am thrilled to announce that the Minnedosa and District Foundation Inc. has stepped forward with a generous donation of $2000.00 towards the TCS Kidz Cafe project.  This of course is a huge help to our project, and will go a long way towards covering our costs.  I just got the letter from Maxine Laws, the secretary of the Foundation today.  This is pretty huge, and not only guarantees our project for this year, but likely assures we will end up with seed money following the sale or raffle to do another project next year.
Awesome!!!!

Monday, October 22, 2012

Some Inspiration

The bike is currently in more pieces than when we started... what the heck are we creating anyway?  From wikipedia:


The cafe racer is a motorcycle that has been modified for speed and handling rather than comfort. Cafe racers' bodywork and control layout typically mimicked the style of contemporary Grand Prix roadracers featuring an elongated fuel tank, often with dents to allow the riders knees to grip the tank, low slung racing handlebars, and a single, rearwardly mounted, humped seat.
One signature trait were low, narrow handlebars that allowed the rider to "tuck in" to reduce wind resistance and offered better control when in that posture. These are referred to as either "clip-ons" (two-piece bars that bolt directly to each fork tube) or "clubmans" or "ace bars" (one piece bars that attach to the stock mounting location but drop down and forward). The ergonomics resulting from low bars and the rearward seat often required "rearsets", or rear-set footrests and foot controls, again typical of racing motorcycles of the era. Distinctive half or full race-style fairings were sometimes mounted to the forks or frame.
The bikes had a raw, utilitarian and stripped-down appearance while the engines were tuned for maximum speed. These motorcycles were lean, light and handled road surfaces well. The most defining machine of its heyday was the homemade Norton Featherbed framed and Triumph Bonneville engined machine called "The Triton". It used the most common and fastest racing engine combined with the best handling frame of its day, the Featherbed frame by Norton Motorcycles. Those with less money could opt for a "Tribsa" - the Triumph engine in a BSA frame. Other combinations existed such as "Norvins", a Vincent V-Twin engine in a Featherbed frame and racing frames by Rickman or Seeleywere also adopted for road use.[10]

Saturday, October 20, 2012

More Great News

I followed up some of my email requests for help with phone calls on Friday.  I'm sure glad I did.  First off, I was ordering some parts from Vortex Racing for my race bike -- I had sent Casey a link to the blog site, mainly for his own interest as Vortex doesn't make stuff for vintage bikes.  However, he thought it was cool and is sending a bunch of shirts my way for the students to have -- a pretty cool treat for the kids.  Check out www.vortexracing.com-- cool stuff for your "more modern" bikes!
Secondly I gave Robert Ward, owner of Omar's DTR a call.  I was asking about his recommendations for a cafe seat for our project.  When all was said and done, he's agreed to donate one of his Manx seats to our cause!  This is incredibly generous and (almost) left me speechless.  It turns out his family has a connection to public education and it has really paid off in our favor.  This has really helped our "bottom line"; as you can see our costs have already passed the $2000 mark, with a few more pricey bits left to purchase.  A picture of the seat is to the left -- again, be sure to visit Omar's website -- his parts are considered to be the best in the business for cafe racers or street track replicas.
After work on Friday I took the fuel tank down to Cycleboyz in Brandon.  They will be welding in a cool low-profile fuel cap into the stock tank.  Chatting over some options with the guys, I really think we found a solution that should look pretty neat.  After that, the inside of the tank will need to be stripped and sealed, and then it will be ready to install for trial running.  I'll have to be patient regarding the paint!
I took a trip down south to Rolla, ND to pick up a bunch of parts for the project I bought on eBay. These items are used, and saved us a fortune over buying new.  There were some shipping and import duties I had to pay, but again, much cheaper in the end.  I've learned over the years that often US-based carriers, such as UPS, tack on a brokerage fee as well as customs duties.  Despite the gas costs, this is a cheaper way to go.
The next session will see us installing the new forks and front end parts.

Thursday, October 18, 2012

A few more odds and ends

Mr Sheppard picked up a set of "clubman" cafe bars, grips, a clutch lever and perch, and some steering stem bearings for the larger forks.  Scott and the gang at Transcanada Motorsports in Brandon were able to give us a discount on the purchase of these parts.  Be sure to check out their site on the right, or if you are in Brandon, stop by the shop.

Wednesday, October 17, 2012

Day 3

Session #3 saw the students rebuild the other brake caliper (just in case we use 2), clean the fuel petcocks, and install the components of the ignition system.
We had soaked the petcocks in Sea Foam for a week, and then took each assembly apart.  This is some of the crud we removed from the inside of each! Yikes! We don't want that getting into the carburetors! There are still some stubborn scales left on the inside... maybe Mr. Sheppard should buy an ultrasonic cleaner... more tools for his garage!


First new screws were installed on the housing -- we learned a good lesson about using the right size tool (in this case a phillips screwdriver) for the job... a tiny, fine tipped one for the fuel petcock, and a larger one for these bolts.


Steady as she goes -- the new Pamco ignition system gets installed.  We installed our system based on instructions posted online by "pamcopete".


Our "hot rod" carburetors also arrived -- bought lightly used from a fellow Canadian XS builder, these are special Keihin flatslide units.  They will require some additional setup, but those who have gotten them to work well are thrilled with their performance.


Monday, October 15, 2012

Big Props to Hugh

Hugh of Hugh's Handbuilt sent me the following email today:

James,

I'll gladly Donate the parts to you, 2" is more fitted towards a good cafe' build in my opinion.  It's out best seller, and most common on these old bikes. 
Let me know what size T-Shirt you wear, and I'll ship out a set of riser bushings and a fork kit no charge :)
Hugh

I had enquired about a fork lowering kit and riser bushings for our Cafe Project -- he had made the offer about donating parts through xs650.com, and it looks like he is coming through for us!

Again, please visit his site -- a hyperlink is posted the the right!!!

Thursday, October 11, 2012

Day 2

Day two of the Cafe project focused on taking some measurements of the front brake components, as well as installing some of the parts we have purchased for the project.  Super-fast shipping from xs650-direct.com had this box show up at the school on Friday afternoon.  It was just like Christmas!
A nice surpise is that Jason threw in several t-shirts along with our order!  If you are an xs650 rider/restorer/builder in Canada, please be sure to support this shop; the link is on the upper right hand corner of the page.

Mr. Sheppard dug through his parts bin at home and came up with two front brake calipers.  These were from a more modern sportsbike, and would likely have far more powerful braking capabilities that what was originally fitted to the bike way back in 1975.  It was a moot point anyway, as the project as-purchased was missing the front brake anyway!  Here a student begins the process of taking apart the calipers -- we are going to strip and rebuild both, and build one right hand side caliper with the best pistons, the newest-looking seals, etc.  Jury is still out as to whether we can use the larger front rotor or not.
Using the piston removal tool Mr. Sheppard brought from home.  Luckily we were able to borrow some torx sockets from Mr. Gugin to split the calipers.

The seat as it was delivered had a tear in the vinyl top, and was not the correct shape for the "cafe look" we are shooting for.  We hoped that by removing the old vinyl cover and foam, we could restore the seat pan, fit some shaped foam and a new vinyl cover.  However, it became apparent that the seat pan was in horrible shape; water had gotten to the inside of the pan itself and started to rust.  It was a mess, and we eventually decided it was not salvageable.  D'oh!  Time to do some thinking about seats.  At least the hinge and bracket hardware was salvageable....
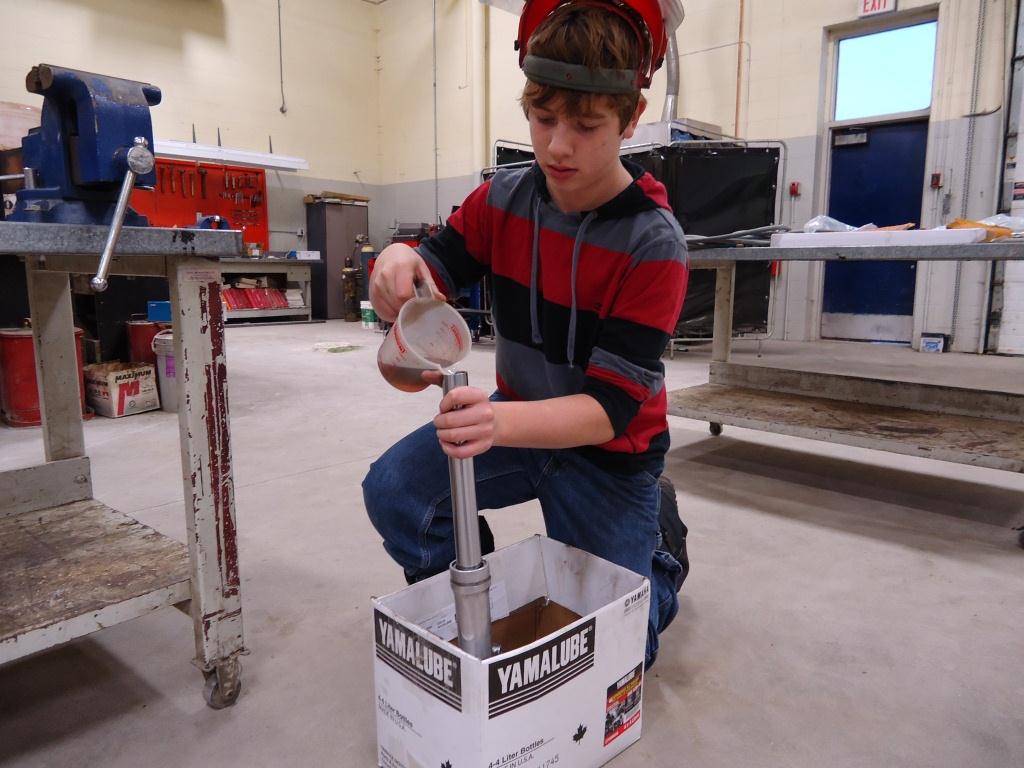
We learned last week that the alternator located off of the end of the crankshaft was in fact an expensive aftermarket piece.  We pulled the covers off the ignition (located at the top end of the engine) and found... nothing.  We need a new ignition system, an aftermarket Pamco unit, as well as a new mechanical advance unit.  Note the almost-stripped phillips bolt -- this will be replaced as well.  At least the bike will have a new, theoretically bulletproof ignition system!

Mr. Sheppard's VISA is getting a bit of a workout...
Next week we are going to finish the front brakes... some more parts will have likely arrived as well.  Stay tuned!