
Thursday, March 6, 2014
Raffle Prep

Wednesday, March 5, 2014
The Rebuild Begins

This is how things sat at the start of our most recent rebuild session.


Wednesday, February 5, 2014
The kindness of strangers...
Back in the 1960s, when Honda was trying to make it in the North American market, they ran an ad campaign along the lines of, "You meet the nicest people on a Honda." It was an attempt to erase the "biker" stigma of the nasty dude on a Harley... Along the same lines, the Kids' Cafe has benefited from the generosity of the motorcycling public.
During our tear down prior to the final build, it dawned on us that we were missing an engine mounting bracket -- the top most one that attached the cylinder head to the frame spine. Typically this would have meant trolling eBay for parts, and while likely not expensive, there would be some hassle with shipping and etc. And on such a small(ish) item, not a great way to spend time. On a whim I put a "wanted" post on xs650forum.com. Mick from PA replied that he had what he needed, and would donate it to our project for free. He even covered the shipping costs as well.
 Imagine my surprise when in the mail came not only the bracket, but a t-shirt (for Mr. S), and some decals for the students. Bonus! The shirt advocates motorcycle safety (reminding car drivers to watch out for bikers), and comes in a very visible shade of orange. And the shipping costs were not cheap! Thanks again, Mick. Your contribution goes a long way to us finishing up this project.
On another note, the frame, swing arm, and sundry bits have been sandblasted, and Mr. Sheppard is making arrangements for powder coating when he is in Winnipeg for a conference next week. Thanks to MillcoSteel in Brandon for the discount on the sandblasting work!
During our tear down prior to the final build, it dawned on us that we were missing an engine mounting bracket -- the top most one that attached the cylinder head to the frame spine. Typically this would have meant trolling eBay for parts, and while likely not expensive, there would be some hassle with shipping and etc. And on such a small(ish) item, not a great way to spend time. On a whim I put a "wanted" post on xs650forum.com. Mick from PA replied that he had what he needed, and would donate it to our project for free. He even covered the shipping costs as well.
On another note, the frame, swing arm, and sundry bits have been sandblasted, and Mr. Sheppard is making arrangements for powder coating when he is in Winnipeg for a conference next week. Thanks to MillcoSteel in Brandon for the discount on the sandblasting work!
Thursday, January 30, 2014
Mocking up Bracketsi
The bike is now totally stripped in order to refinish it for the final time. Part of this process is machining and fabricating the final brackets for some of the component parts. With older bikes, the improvement in braking capabilities compared to modern-day machines is huge. New calipers, new pad compounds, piston design, etc, have led to much safer and controllable machines. To that end, Mr. Sheppard rooted through his box o' parts at home and dug out a spare Nissin caliper, actually from a Honda RC51 superbike. That machine runs two front calipers, but considering it's capable of the far side of 150mph, not a bad idea. One caliper should be sufficient for us.
 Step one was mocking up a rough template in wood. Using some scraps from the TCS woodworking facility, an hour and a half of measuring, drilling, cutting and sanding (and 3 attempts) netted us this result. A start, and a rough guide for the machinists to build upon.
 Modern four-piston calipers do tend to be "deeper" in that there are active pistons on both sides of the caliper. There are sometimes clearance issues between the wider caliper and the narrow spokes of a vintage wheel. Some material from the backside can be removed, but you need to be very careful... of course the whole assembly is under considerable pressure! As well, the "old" front brake rotor is nearly twice as thick as the modern equivalent. The rough mockup shows that things should work, but there will no doubt be some more tweaking as this sub-project continues.
Wednesday, January 15, 2014
The disappearing bike...
In order to complete this project, our next step is to totally disassemble it down to the component parts for final cosmetic finishing. Ultimately the frame itself will need to be stripped and powder-coated, and the bike rebuilt from there.
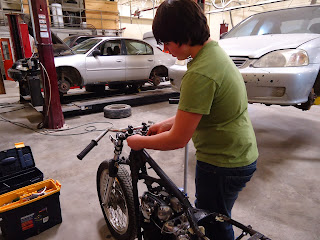 First major step after all the ancillaries were removed was to take off the front end -- forks, wheel, triple clamps and all! The entire unit will be kept intact in order to fabricate a bracket to use the more modern 4-pot Nissin front brake caliper.
 Once the forks were removed, the engine was next. It took a bit of grunt work to shoe-horn it out of the frame. A few seals need to be replaced (clutch rod actuator and counter shaft seal)... not sure if that should be done with the engine out, or back in the frame again.
 The foot pegs were chromed from the factory, but are now pitted and rusty. We are going to take them apart and get them powder coated. However a rivet needed to be removed first, which will be replaced but a nice bolt when they are reassembled. Here a student is grinding off the head of the rivet, in order to punch it out.
 The spring... photo for reference purposes so we know how to put it back together!
 Where we left things. The frame needs a few unnecessary tabs ground off, and an exhaust mount stud welded on. The swing arm is stripped, as well as the rest of the steel parts. Next step, finding a shop to blast and powder coat the frame... but what color???


Thursday, December 19, 2013
Getting a little help...
With a completion date of March starting to loom in the not-so-distant future, and with kids busy with hockey and other activities, Mr. S has come in solo to complete the rest of the wiring. A tedious job, but thanks to Mr. Gugin and some of his testing equipment, some stubborn questions have been answered, and the bike is now wired. Working on 2 or more wiring diagrams was bound to be difficult, but Mr. G's experience sure helped out.
We were also able to benefit from a really cool hydraulic pipe expander that Minnedosa Collegiate has in their shop. The Dime City Cycles muffler fit too snugly with the MAC headers. A wee tweak with the pipe expander, and things now slide on and off with a near-perfect slip fit. A clamp is next, and the final step will be to weld a muffler mount to the frame.
After that it will be a mad rush to tear the bike down for powdercoating, paint, and final assembly. More pics to follow after the Christmas break. Stay tuned!
Wednesday, December 11, 2013
Christmas homework
As promised, here is a pic of the beautiful welding done by our supporters, Cycleboyz in Brandon.
 This is a stainless steel muffler mount, fabricated and welded onto our muffler donated by Dime City Choppers. As you can see, the welding quality and general workmanship is superb. Thanks Cycleboyz! Check out their shop and some of their projects via the link on the right.
 Just in time for Christmas, now that the mechanical and electrical work is being completed, we need to starting thinking about the aesthetics of the machine... the color combinations, including the frame, swingarm, tank, and tail section. Based on suggestions that come forward, we might vote, we may draw out of a hat... who knows? Mr. Sheppard spent lunch hour sketching/tracing the side profile you see to the left; some work with some pencil crayons and/or markers and we should have some good ideas!


Subscribe to:
Posts (Atom)